So let me start out by saying I LOVE HP hardware, they build stuff well, that being said their software sucks! (Well the HP Quick Start App for Windows 8 that works as a proper start menu rocks, but that’s about it). Once we figured out the Windows 8 printing issues with the Adobe App vs Desktop, and using Adobe Reader on MACs instead of the built in OS reader, printing in general has gone smoothly… unless you have an HP printer.
Now not ALL HP users have had issues. I think in part because people like myself won’t touch the CD that comes with and just install the drives (Windows 7 & 8 make this very easy). Again, HP software sucks! Many people just don’t know how to install it with out the CD and that’s okay. The big issue that people are having is the software or a driver that is with it automatically sets a large print margin on the bottom of the page.
Now unless doing ‘borderless photo’ which will waste ink and NOT print to scale, printers are not meant to print to the vary edge of the page. there is a 1/8-3/16″ of unprinted area around all 4 sides and designers take this into account. But because of the larger print margin issues on the bottom with the HP software this it cuts off about 1/2″ of the bottom of each page, cutting into the image/pattern piece. While for some stuff this is not a big issue, for .PDF sewing patterns this is often a HUGE issue. Because of the unique assembly of EYMM patterns my customers have been okay, even with this missing section; but it makes many other designers patterns unusable, which has led to ladies paying to get them printed elsewhere or buying a new printer. Some have had luck using legal size paper, but honestly it’s a pain.
For the last year I have been trying to help troubleshoot the issue because it will NOT let you adjust the margins in the settings. Well today Rylee was chatting with me and tried something and it WORKED. I sent her a few patterns to try it on and I can say she is relieved to know she is not/was not crazy, just her printer software is.
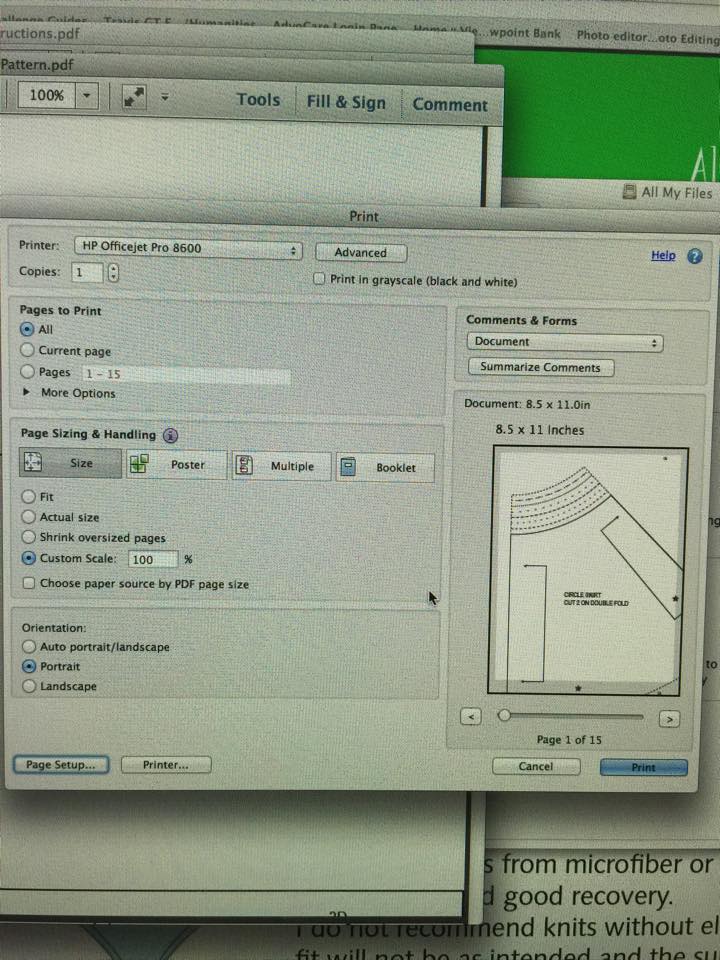
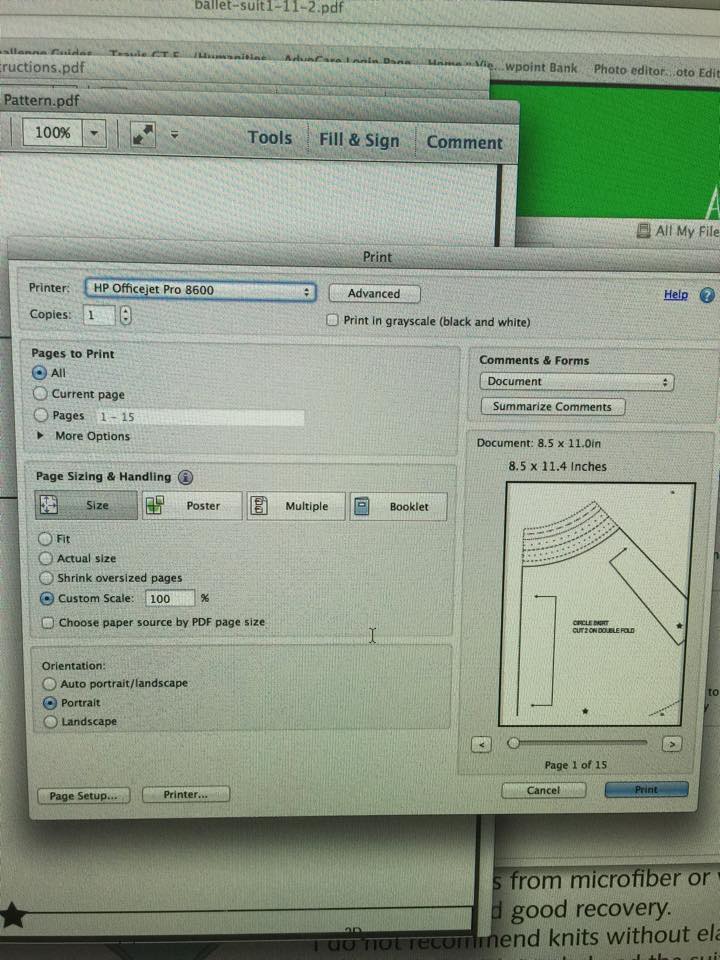
So the trick? Instead of using the auto 8.5×11″ paper size, she changed it to manually be 8.5×11.4″. You can see here from the screen shots. If you are using A4 and have similar issues you just want to adjust your paper size length so that it’s long enough to include the full picture. Because A4 is longer this isn’t generally an issue when printing US patterns designed for letter size. Now keep in mind you are still USING 8.5×11″ Letter sized paper, you are just telling the printer it’s 11.4″ so it doesn’t cut off your pattern.
To change this you are going to click ‘Properties’ and change your paper size UPDATE, got the screen shots from the wrong computer, I will updating them later this week when I have a chance to print from our other computer.
Now here are 2 examples of what the differences are when you actually hit print. Note the missing image at the bottom with the default settings.
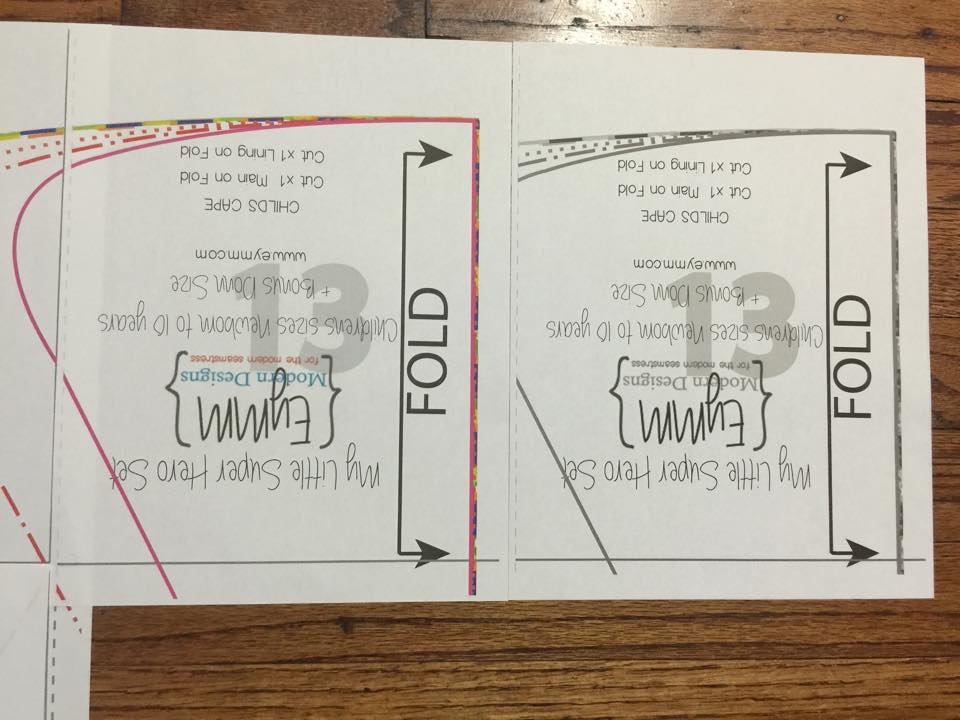
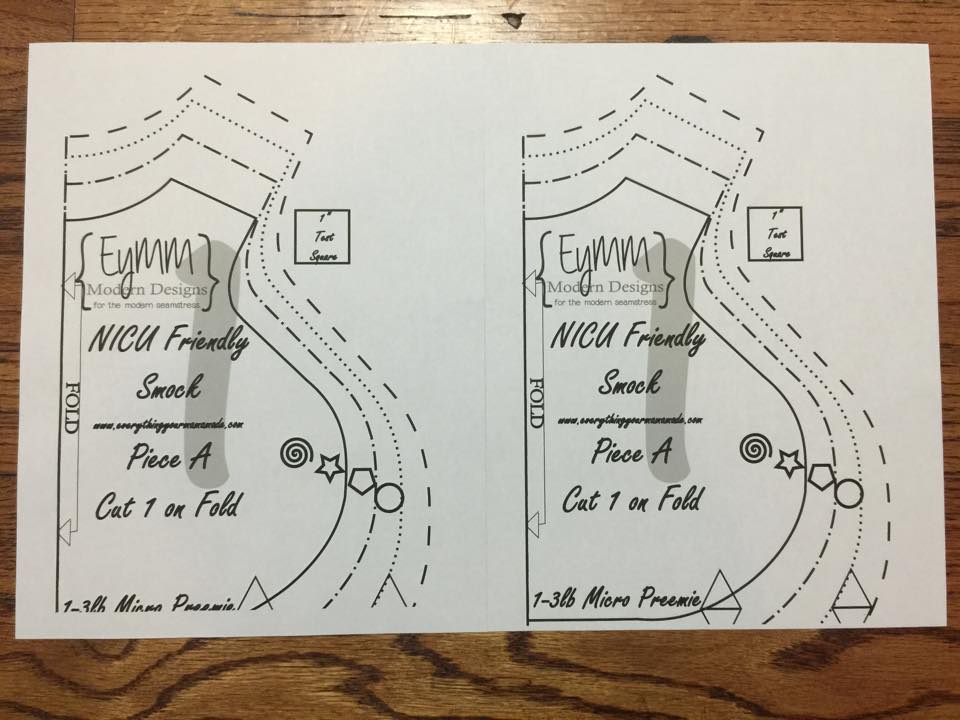
So who does this effect and WHY does this matter? This effects a HP printer owners who have that thicker bottom margin in their print preview on both PC AND MAC. Why does this matter? While EYMM patterns have a .75″ overlap which is bigger then the approx .5″ print gap for HP printers, many designers don’t. And if you are missing .5″ of your pattern pieces they will generally not assemble correctly (the marks for lining up/laying out the pieces is one of the things often cut off) and if they are rectangular pieces that seam to line up fine they may be off size wise.
So if you are one of Rylee’s fellow HP printer owners who also happens to love .pdf sewing patterns I hope this helps you not only know that you are NOT crazy, but also makes your .pdf sewing experience MUCH more positive!